Panko Chicken

Ok, I have just about had it with the stupid super lean chicken breasts in the store. Do yours squeak when cooked? Mine did. When they "look" done, they are over done. When they ARE done, they look unattractively underdone. I've tried braising, pan sauteing, oven baking, roasting, etc. But when I cook a boneless skinless chicken breast, I keep hearing that obnoxious squeak when I cut it that means it's over cooked and dried out. Bleh.

It's easy to cook up a moist and lovely chicken thigh or a whole bird...or even a bone in skin on chicken breast. But the weekday speedy boneless skinless breast was really beginning to annoy me.

So, I tried a bunch of stuff. Really I did. I ruined many a batch o' chicken breasts. Then one day, I tried again. The first thing my son said after sampling this experiment was "Wow. I can even cut this with a fork." Then he said "This is awesome, I'd pay $30 for that in a restaurant." 22 year old men are odd things.

I guess I finally figured it out. Here's what I did. Now remember,  my non chicken ingredients are at this point rather estimated because I only made it once and am not much of a measurer anyway. The recipe was repeated with success by a friend though so I think it's pretty dratted close. I'll edit it later if I find that I am off in an important area.

Panko Buttermilk Chicken Breasts

The main ingredients with notes as to flexibility and variations on a chicken breast theme:


3 large organical chicken breasts of the uneven size and proportion (don't worry, we'll fix that)

Enough Buttermilk to cover the chicken breasts (I did not measure and really, most of it will be poured down the drain later so don't worry about the calories, ok?)

Several shakes of Tabasco sauce (optional, but I thought it made a wonderful flavor enhancement and besides I love my food spicy, although this did not make the chicken spicy, there was just a hint of something extra)

1 1/2 cups Panko Japanese Style Bread Crumbs (I used the Italian seasoned ones this time, but it's not important cuz you add whatever seasonings you want and I meant to grab the plain when I was at the store and I just didn't. So this is what I had to work with)

1 cup freshly grated Parmigianno Reggiano (or your favorite hard Italian cheese all grated up. Do make sure it's fresh grated. Never buy grated cheese in a bag or plastic container unless you don't like the people coming over for dinner)

More Seasonings (I used probably 3 t or even more of garlic, oh say 2 t dried parsley, about a 1 of oregano, and a number of turns of the black pepper mill. You use the seasonings that you like. You might not be a major garlicaholic like me so you would NEVER additional garlic if you got the Italian seasoned Panko. BTW, you don't have to make this Italian. Use whatever your favorite herbs and seasonings are. You may love white pepper tarragon chicken or you may be a big Herbs de Provencal person. If so, then make it so.)

How the thing is put together and baked to glorious tenderness and juiciness:

Get out one of those big zip lock bags and your meat mallet. Put one chicken breast inside the ziplock bag. Do not seal it, but lightly flatten the open end with one hand because you are about to whack the whathaveyou out of your chicken with the flat side of the mallet and you don't want the chicken squirting out. Don't use the bumpy side of the mallet, ok? Whack away. Whack until the breast is about even thickness throughout. You'll probably find it between 1/2 an inch to 3/4 of an inch thick depending on how big the breasts were in the first place. Repeat with the other two breasts.

One thing you will notice is that your three breasts are now incredibly huge. Didn't look like so much meat before. Now you know that only 1/2 of one is going to be just fine for dinner. Put the flattened breasts in a bowl or other container with a lid. Cover with buttermilk. Lift each breast to make sure the buttermilk gets all around them. Stir in some Tabasco while you are doing the lifting part. Cover and return to the fridge for about 1/2 an hour to an hour or whatever amount of time you find you have. Bring out of the fridge and sit for 1/2 an hour to bring to room temperature before cookery.

Preheat your oven to 500 degrees. Yes. 500, not 350, not 375, not 425. 500 degrees in Fahrenheit.

While the oven is heating up, mix up all the other non-chicken ingredients in a wide bowl. Inhale the aroma and adjust the seasonings until the dry mix smells awesome. This is my most favorite of mindfulness cookery techniques. Use your nose, eyes, and memory in addition to a recipe.

Line a large baking pan with foil and give it a spritz of non stick spray.

Pull out one of the chicken breasts and coat well with the Panko mix on both sides. Place in the pan. Repeat. Repeat.

Now, the best thing is if your chicken breasts do not touch so use a large enough pan. If they have to touch you may need to add five minutes to the cookery time.

When the oven preheating dinger goes off and you know your oven is really hot, put the pan in and let it bake for about 20 minutes. Yes. 20 minutes. If you think your chickens were more on the 3/4 inch size you may need five more minutes. I will let you cut one or use your meat thermometer to make sure. Then remove from the oven and let them sit in the pan for five minutes to seal in the juiciness and flavors.

As you can see, the chicken was not only perfectly cooked but the Panko gave it a nice brownness - which helped me mentally because a non-browned chicken shrieks underdone to me and I am immediately prejudiced against it. Give it a try. If you use different seasonings, let me know what you did and how it turned out.

Don't forget to enjoy your chicken mindfully. :D


Soup With an Asian Flair

I am not Asian. I have a good friend that is Thai, though. She cooks for me a lot, for which I am perpetually grateful. She's been busy lately and so I decided to make her Yum Nua for dinner. Now, when she makes me a meal, there is usually a soup starter and rice served on the side. I am lazy and decided to combine the first course of soup with the rice, with a bunch of ideas from other recipes, and food memories to create...

Jasmine Ginger Soup

Ingredients of an estimated nature cuz sometimes I just poured from the bottle. This is ok anyway because soups are always personal and to taste, so taste at many points along the way:

1 chunk of ginger cut off a root, peel removed - about the size of a quarter
2 scallions rough cut and smooshed a bit with the side of your cleaver
4 cups no salt veggie stock (or chicken if you prefer)
1/4 cup Sherry - please get drinkable sherry and not "cooking" sherry. It doesn't have to be the expensive kind.
2 t low sodium soy sauce
1 cup carrots thin sliced on the diagonal - soup eating sized
1/4 cup Jasmine rice, uncooked
a couple dried Shitake mushrooms, reconstituted and chopped small (more if you love mushroom)
1/2 cup Sugar Snap peas or Snow Peas if you like them best, rinsed, ends trimmed and cut with diagonal lines into thirds
2-3 scallions chopped for garnish

How I made it:

In a large pot (with a lid), I combined the ginger, smooshed scallion, stock, sherry, soy sauce, and carrots. Bring to a simmer, cover, and after oh 15 minutes or so, remove the scallion and ginger with a slotted spoon. They are just there to provide lovely flavors to the stock.

Add the rice and simmer covered until the rice is done, about 30 minutes. The amount of rice here makes this a perfect first course soup. Mine sat in the fridge a couple hours before dinner and the rice grew to the point where it was a most filling soup. I may consider cutting it a bit, but not too much depending on what the other dishes are going to be.

About 10-15 minutes before serving, add the mushrooms. It will smell wondrous right now. Inhale deeply. Return to a simmer. About five minutes before serving, add the peas. Because you cannot help yourself, taste the soup stock and adjust the flavors.

Check the flavors:

You may want to add the water the mushrooms were reconstituted in (I did not because my son does not care for mushrooms and I only hoped he would not notice the bits floating about), fresh cracked black pepper, more soy sauce, some ground hot Thai chilis, or any other flavor you think it needs. Remember, there is salt in the soy sauce, so refrain from salting if you can. If you need to, add tiny twists one at a time til it is perfect.

Serve immediately and top with the chopped scallions. I'm making this ahead of time so all I have to do is reheat tonight. I'll post a pic of the soup then!

Sloppy Portobello

I wanted a sandwich. A hot sandwich, mindfully considered and able to satisfy my hunger. After all the holiday eatery, the last thing I wanted was another hunk of meat, no matter how tasty. Eating a grilled cheese did not seem particularly mindful on a day where I wanted to watch fats and calories. 

Actually, what I wanted was a Sloppy Jose'. But, that means ground beef. So, I thought about it a bit and decided that it would be most mindful indeed to allow the meaty portobello mushroom to star in the show as it has been understudying the role for some time now.

If you are interested in nutrition facts, you will be very much pleased with how they work out for this dish.

Ingredients with a few substitutions and such but no apologies for rinsing the mushrooms:

1 tbsp. olive oil
1 small red bell pepper, cored,seeded, and thinly sliced
1  thinly sliced yellow onion
1 pound Portobello Mushrooms, rinsed (yes, rinsed*), dried, and thin sliced
3 cloves garlic, peeled andchopped
1 tbsp. Worcestershire sauce
2 tsp. oregano
½ t dry mustard
1 T chili powder
1 T brown sugar
crushed red pepper flakes to taste
fresh cracked black pepper to taste
1 tomato, chopped - include all the juices
2 tbsp. tomato paste

A few things to consider using in addition or instead:

powdered garlic instead of fresh chopped, parsley or cilantro, prepared mustard instead of dry, cayenne instead of red pepper flakes, other veggies like zucchini, etc.

How I did it and how you can too:

Because it is a mindful way to cook, I prepped all the veggies and seasonings before beginning the actual cookery and place everything in little bowls all ready to go.

*I do not trust that you and your mushroom brush will remove all potential crud; so rinse them under running cold water, pat dry with paper towels checking all the while for stuck crud, trim the stems a bit because they do tend to get a bit hard where they were broken off from their nice pile of moist soil, and thin slice to your preference of length. I used mini bellas this time because that is what I had and I love them. I cut then in half and then sliced. Next time I may use full grown portobellos and leave them in long strips like I did the onion and sweet red pepper.

Set all the prepared ingredients within their little bowls, sitting sharply at attention, in a precise row in order of use. I like to do that because that way I don't lose track of any one part of the recipe - which I have done a few times only to discover afterward that I had added a great deal of onion powder to a dish that should have had a great deal of garlic powder...or that I left out some key ingredient and ended up with a big ole fail.

Go ahead and put all the seasonings except the fresh garlic in a single little bowl - inhale well, it's the only way to learn to cook with your nose. If you are using dried powdered garlic, that's fine - just measure the equivalent dose and put it in the seasoning bowl with the rest.

That said, you do need to keep the spices and such set out so that when you taste it you can edit the flavors to suit you. I do not add salt very often, only when there is a distinct reason to do so. If you are used to it you may find that this needs salt. I will strenuously object because you are submitting to a food craving supplied by manufacturers of food products that have retrained the world's taste buds to expect salt (and sugar). But as long as I am not the one eating it, I guess it's ok. You may want to cut back a tad on the other seasoning if you *shudders* add salt though. Because I do not salt (maybe I should put that in all caps), I ramp up the other seasonings and in particular, ramp up the heat as that does for me what salt does for you.

Actual cookery instructions now that I am done with all the stuff you have to know about how to do this:

Heat the olive oil over medium heat in a non-stick skillet. Then add the sweet red pepper and onion strips. Saute stirring only every now and then so the veggies have plenty of opportunity to connect with the pan which results in some lovely brown bits. You don't have to caramelize them now. They will finish caramelizing with the mushrooms. When the onion is quite soft, add the mushrooms and continue as you have begun. 

When the mushrooms are soft and have beautiful brown areas, add the garlic and saute another minute or three. Then dump in the contents of the seasoning bowl and stir for not quite a minute (make sure to take a whiff as the seasonings begin to meld with the veggies - sublime).

Finally, add the brown sugar, tomato bits, and tomato paste** and stir well. Allow to simmer a few minutes while the whole wheat bun is toasting.

**I like to use a tomato paste from Italy that comes in handy dandy little tubes so you can just squish out exactly what you need. It's only made from Roma tomatoes which makes it very mindful.

When the bun is toasty, your Sloppy Portobello is ready to be assembled. Enjoy mindfully and slowly.

Orecchiette with Greens and Radishes

If you're anything like me, you've spent the last couple weeks indulging in some holiday meals and drinks and sweet treats. It's okay. We all do it. You might be feeling about ready to start your January diet. Well, why don't you wait an extra couple of days? 2011 isn't over yet. There's still time to sneak in one last not-so-healthy dinner of cheesy pasta topped with crunchy breadcrumbs. Would it help if I told you it had some vegetables in it (sauteed in butter, but still)? I promise, it's crazy delicious. Your New Year's resolutions can wait.


Orecchiette with Greens and Radishes
From Bon Appetit
  • 5 tablespoons extra virgin olive oil, divided
  • 3/4 cup coarse fresh breadcrumbs made from whole wheat bread
  • 2 teaspoons finely grated lemon zest
  • 1 teaspoon crushed red pepper flakes
  • 1 pound orecchiette
  • Kosher salt
  • 1 tablespoon unsalted butter
  • 1 bunch radishes (about 6-8), sliced into 1/4" rounds
  • 3 garlic cloves, sliced
  • 2 bunches greens, such as escarole or chard, trimmed and chopped
  • 1 cup finely grated Parmesan
  • 1 tablespoon fresh lemon juice
  • 1/2 teaspoon cracked black peppercorns
Heat 2 tablespoons oil in a large skillet over medium heat. Add breadcrumbs and toast, stirring frequently, until golden and crisp, 4-5 minutes. Transfer to a small bowl; stir in lemon zest and red pepper flakes. Set aside.

Cook pasta in a large pot of boiling salted water, stirring occasionally, until tender but still firm to the bite. Drain, reserving 2 cups of pasta cooking liquid.

Meanwhile, heat 1 tablespoon oil and butter in a large deep skillet over medium-high heat. Add radishes; cook, stirring often, until browned in spots but still crisp-tender, about 2 minutes. Transfer to a small bowl.

Add remaining 2 tablespoons oil and garlic to skillet; stir until fragrant, about 1 minute. Add greens and 1 cup pasta cooking liquid and cook, stirring often, until greens start to wilt. Add pasta and cheese; stir until cheese melts and sauce is slightly thickened, adding more pasta cooking liquid by 1/4-cupfuls if too dry. Stir in radishes, lemon juice, and pepper. Season with salt. Sprinkle with breadcrumb mixture.

Truffles

yes, truffles. Easy peasy way to enjoy a fancy treat or a great gift for a friend.

Truffles

The list of ingredients is so long, you had better print this page out:

1/3 cup whipping cream
8 oz semi sweet baking chocolate
1/3 cup butter
cocoa and powdered sugar

Directions that are complicated but worth every difficult step:

In a medium sized pan over low heat, melt the chocolate into the cream. Remove from heat and stir in the butter until it melts and the mixture is creamy. Refrigerate for an hour or two until it is firm enough to handle but not overly hard - if it gets hard, just let it come to room temperature.

Dust the palms of your hands with either powdered sugar or cocoa. Work fast and scoop small blobs of truffle mix and roll into balls. Roll them in more powdered sugar and cocoa.

Now wasn't that hard? Nope! My son used to make these for his teachers in elementary school for his annual gift. All I had to do was help with the stove part. It turned out his hands were the perfect temperature for rolling. Some people have too high a body temperature which makes the truffles melt instead of roll. If your hands are too hot, try rinsing them in cold water before rolling (dry thoroughly).

Refrigerate the pretty things until you want to eat them. Before serving, let them come to room temp (doesn't take as long this time because the little balls warm up fast).

They will be incredibly creamy and wonderful. Put them in pretty containers for gifting.

Eating one of these is the most incredibly mindful experience. Take your time. Do not rush. Let the chocolate melt in your mouth until the goodness spreads completely throughout you. Repeat. Enjoy.

Horseradish Cream

Make this early in the day and refrigerate to be served with a standing rib roast. One of my nieces actually prefers the cream to the roast itself, it's that good.

Now, when I eat this I don't worry about the calories as this is an annual treat. But if you just gotta know, you can find the nutrition facts here.

Horseradish Cream

Ingredients:

½ c  heavy whippingcream
1/8 c  mayo
1/3 c  horseradish,drained
1 T  mustard, Dijon
1/8 t  sugar
1/8 t  salt
¼ t  pepper

Directions:

Whip the cream in a cold bowl with cold beaters until softpeaks form. In a separate bowl, combine mayo, horseradish, and mustard. Usingrubber spatula, fold in the whipped cream. Add sugar, salt, and pepper totaste. Stir well and transfer to serving bowl.

Easy to alter to taste - more or less horseradish, mayocream etc. I used more horseradish and a little more mayo tonight and a littleless cream. 

Yum is an understatement for this dish. It is impossible to eat without going through a remarkably mindful moment. Enjoy.

Warm Farro Pilaf with Kale and Cranberries

This is basically the perfect fall/winter dish. Yeah, I said it. I just don't see how you can improve upon it. It has such a great combination of textures and flavors -- chewy, crunchy, savory, sweet, spicy -- it's a total party in your mouth. It's good enough to stand on its own, but it would also be a great paired with roasted root vegetables or roast chicken (for all my carnivorous friends in the audience).


Warm Farro Pilaf with Kale and Cranberries
From Vegetarian Times

Farro
  • 1 tablespoon olive oil
  • 1 medium carrot, cut in half
  • 1 celery rib, cut in half
  • 1/2 small onion
  • 1 1/4 cups pearled farro
  • 4 cups vegetable broth
Pilaf
  • 2 tablespoons olive oil
  • 1/2 medium onion, diced
  • 1/2 pound kale, center stem removed, chopped (about 4 packed cups)
  • 2 cloves garlic, minced
  • 1/2 tsp. Aleppo pepper or 1/4 tsp. red pepper flakes
  • 1/2 cup dried cranberries
  • 1/3 cup toasted pine nuts
To make farro: Heat oil in saucepan over medium-high heat. Add carrot, celery, and onion. Cook 3 to 5 minutes, or until vegetables start to brown. Add farro, and stir to coat grains with oil. Pour in broth and bring mixture to a simmer. Reduce heat to low and cover. Cook 20 minutes, or until just tender; drain. Discard carrot, celery, and onion. Cool farro. (This step can be done ahead.)

To make pilaf: Heat oil in large skillet over medium-high heat. Saute diced onion 5 to 7 minutes. Add kale and cook another 5 to 7 minutes, or until just wilted. Reduce heat to medium, and stir in garlic and pepper. Cook 1 minute, then add farro. Saute 3 to 5 minutes, or until warmed through. Remove from heat and stir in dried cranberries and pine nuts.

Pappardelle with Swiss Chard, Onions, and Goat Cheese

If yesterday's post was a stealth recipe, today's is the opposite: a complete no-brainer. With a stealth recipe, the ingredient list looks fairly humdrum, but the completed dish surprises you with awesomeness. With a no-brainer recipe, you can tell just by looking at the dish's components that it is going to knock your socks off. I mean, come on. Pappardelle, one of my favorite forms of pasta? Sweet red onions? Creamy goat cheese? Alzheimer's-fighting Swiss chard? I knew I'd love it, and I did. Simple as that.


Pappardelle with Swiss Chard, Onions, and Goat Cheese
From Real Simple
  • 12 oz pappardelle
  • 2 tablespoons olive oil
  • 1 small red onion, thinly sliced
  • 4 cloves garlic, sliced
  • 2 bunches Swiss chard, washed thoroughly in a bowl of cold water, stems discarded, and leaves cut into 1-inch strips
  • Kosher salt and black pepper
  • 4 oz fresh goat cheese, crumbled
Cook the pasta according to the package directions. Reserve 1 cup of the cooking water; drain the pasta and return it to the pot. 
Meanwhile, heat the oil in a large skillet over medium-high heat. Add the onion and garlic and cook, stirring occasionally, until the onion is soft, 3 to 5 minutes. Add the chard and 1/4 teaspoon each salt and pepper and cook, tossing frequently, until tender, 3 to 5 minutes more.

Add the chard mixture, 3 ounces of the goat cheese, 3/4 cup of the reserved cooking water, and 1/2 teaspoon salt to the pasta and toss until the goat cheese melts and coats the pasta (add more cooking water if the pasta seems dry). Serve sprinkled with the remaining ounce of goat cheese.

Lentil & Farro Soup

This soup is what I like to call a stealth recipe. You read it over, take a look at the ingredient list, and you're like, okay, that sounds pretty good. Just pretty good, not amazing. But then you make it... and you are utterly SHOCKED at how delicious and flavorful it is. This recipe is kinda like that. Stealthy. It seems humble at first glance, but the combination of chewy farro, aromatic curry, lemony yogurt, and those occasional sweet bursts of sweet potato combine into something awesome that's soon to be one of your new favorite soups.


Lentil & Farro Soup
From Super Natural Every Day
  • 2 tablespoons olive oil
  • 2 large yellow onions, chopped
  • 1 cup peeled and diced sweet potato or winter squash
  • Sea salt
  • 1 tablespoon + 2 teaspoons Indian curry powder
  • 2/3 cup whole or semi-pearled farro
  • 1 1/4 cups lentils, picked over and rinsed
  • 6 to 7 cups vegetable broth or water
  • 1 cup plain yogurt or Greek-style yogurt, or creme fraiche
  • Grated zest and juice of 1 lemon
Heat the oil in a large soup pot over medium-high heat. Stir in the onions and sweet potato. Add a big pinch of salt and saute until the onions soften a bit, a couple of minutes. Add the curry powder and stir until the onions and sweet potatoes are coated and the curry is fragrant, a minute or so. Add the farro, lentils, and 6 cups of the broth. Bring to a boil, decrease the heat to a simmer, cover, and cook for 50 minutes, or until the farro and lentils are cooked through. (If you're using semi-pearled farro, the cooking time is about 25 minutes.) Taste and season with more salt if needed; how much you'll need depends on the saltiness of your broth. Don't under-salt; the soup will taste flat.

While the soup is cooking, in a small bowl, stir together the yogurt, lemon zest and juice, and about 1/4 teaspoon of salt. Serve each bowl of soup topped with a dollop of lemon yogurt and a drizzle of olive oil. Video Marketing Blaster Reviews - Techno Reviews Video Marketing Blaster Reviews - Techno Reviews Video Marketing Blaster Reviews - Techno Reviews

Carrot Cake Jam

In my book, there's no better way to brighten up a dark late-autumn day than by making a batch of sweet, brightly colored jam. This "carrot cake" jam is a bit unusual but oh-so-good. It makes anything taste like dessert -- even breakfast. Particularly great served on toast with a generous schmear of cream cheese.

(Note that this recipe makes 7 half-pints, so you may want to halve it, as I did.)

One Year Ago: Rice with Sage-Infused White Bean Sauce

Carrot Cake Jam
From Better Homes and Gardens' Canning
  • 2 cups finely shredded carrots (about 4 medium)
  • 1 cup finely chopped, peeled pear
  • 15-ounce can crushed pineapple (packed in juice), undrained
  • 2 tablespoons lemon juice
  • 1 teaspoon ground cinnamon
  • 1/2 teaspoon ground nutmeg
  • 1.75-ounce package regular powdered fruit pectin
  • 4 cups granulated sugar
  • 2 cups packed brown sugar
  • 1/4 cup flaked coconut or raisins (optional)
  • 1 teaspoon vanilla
In a large heavy pot, combine carrots, pear, pineapple with the juice, lemon juice, cinnamon, and nutmeg. Bring to boiling, stirring constantly; reduce heat. Simmer, covered, for 20 minutes, stirring frequently. Remove from heat. Sprinkle mixture with pectin; stir until pectin dissolves.
Bring carrot mixture to boiling, stirring constantly. Add granulated sugar and brown sugar. Return to a full rolling boil; boil for 1 minute, stirring constantly. Remove from heat. Quickly skim off foam with a metal spoon if there is any. Stir in coconut or raisins (if desired) and vanilla.

Ladle hot jam into hot, sterilized half-pint canning jars, leaving a 1/4-inch headspace. Wipe jar rims; adjust lids.

Process filled jars in a boiling-water canner for 10 minutes (start timing when water returns to boiling). Remove jars from canner; cool on wire racks.

Makes 7 half-pints.

Harissa Ravioli

Have you guys discovered harissa yet? It's a North African hot chili sauce, and it's definitely having a culinary moment. I made my own batch a couple weeks ago and have really been enjoying it, but you can find it in gourmet shops or even in high-end grocery stores (like Whole Foods). Be warned, the spiciness does vary from brand to brand.

Heidi Swanson's Super Natural Every Day -- the cookbook on which I currently have the biggest crush -- contains a couple different recipes featuring harissa, and this is one of them. It's a winning recipe: it's extremely quick, and it's bursting with flavor. Definitely one that I'll be making whenever harissa finds its way into my kitchen.


Harissa Ravioli
From Super Natural Every Day
  • 1 clove garlic, smashed
  • 1/4 teaspoon fine sea salt
  • 2 tablespoons fresh lemon juice
  • 2 tablespoons harissa
  • 1/4 cup extra virgin olive oil
  • 12 ounces fresh or frozen cheese-stuffed ravioli or tortellini
  • 8 ounces broccoli florets or broccolini, trimmed into bite-size pieces
  • 1/4 cup pepitas, sliced almonds, or pine nuts, toasted
  • 1/4 cup crumbled feta cheese
  • 1/4 cup kalamata or black oil-cured olives, pitted and torn into pieces
Bring a large pot of water to boil. In the meantime, make the harissa oil. Sprinkle the smashed garlic clove with the salt and chop into a paste. Transfer it to a small bowl and stir in the lemon juice, harissa, and olive oil. Taste and add more salt, if needed.
When the water boils, salt it generously, add the ravioli, and boil until they float and are cooked through, usually just 1 or 2 minutes (but check cooking instructions on the package). About 30 seconds before the ravioli have finished cooking, add the broccoli to the pot, boil for the remaining time, then drain.

Put the ravioli and broccoli in a large mixing bowl. Toss with a couple spoonfuls of the harissa oil and most of the pepitas. Taste and add more salt, if needed. Turn out onto a serving platter and top with more harissa oil, the remaining pepitas, the feta, and olives.

Variations: Substitute cauliflower or pan-fried Brussels sprouts for the broccoli.

Risotto with Butternut Squash, Leeks, and Basil

So, I subscribe to at least half a dozen cooking magazines. There's Bon Appetit, Food & Wine, Everyday Food, Cooking Light, Eating Well, and Vegetarian Times. Plus the magazines that aren't entirely food related but that always have a recipe section: Southern Living, Martha Stewart Living, Real Simple... what I'm trying to say is, a lot of magazine recipes pass through my hands each month. Many of them get torn out and placed in a "to-make" folder that I turn to for inspiration as I'm planning my menu for the week.

This recipe is one I must have torn out last winter and then never gotten to. It's been languishing in the folder for months, all summer long, when butternut was the last thing from my mind. But I knew as soon as squash was back in season, this risotto was gettin' made. Today was finally the day, and it was totally worth the wait. Hopefully I won't wait until next year before making it again.


Risotto with Butternut Squash, Leeks, and Basil
From Bon Appetit
  • 3 tablespoons olive oil, divided
  • 4 cups 1/2-inch cubes peeled butternut squash (from a 2 to 2 1/2 pound squash)
  • 3 cups 1/2-inch slices leeks (white and pale green parts only)
  • 1 tablespoon chopped fresh thyme
  • 2 cups arborio rice
  • 7-8 cups vegetable broth
  • 1 cup chopped fresh basil
  • 1/2 cup freshly grated Parmesan cheese
Heat 2 tablespoons oil in heavy large pot over medium-high heat. Add squash and saute until beginning to soften and brown around edges, about 5 minutes. Transfer squash to medium bowl.
Reduce heat to medium; add remaining 1 tablespoon oil, leeks, and thyme to same pot and stir until tender but not brown, about 5 minutes. Add rice and stir 1 minute. Add 1 cup broth and simmer until absorbed, stirring frequently, 3 to 4 minutes. Add remaining broth by 1/2 cupfuls, allowing each addition to be absorbed before adding next, stirring often, about 15 minutes. Return squash to pot. Continue to cook until rice is just tender but still very creamy, stirring gently and often, about 10 minutes (about 25 minutes total cooking time). Remove from heat. Stir in basil and freshly grated Parmesan. Season to taste with salt and pepper.

Halloween Chili

As I'm sitting at my desk writing this post, it's Halloween evening and I'm getting lots of adorable trick-or-treaters at my door. The best so far was the family of three boys all dressed as Star Wars characters (Yoda ears sticking out of a stroller = the cutest ever). And how appropriate that this recipe is just perfect for Halloween. This is the kind of meal that would be great to make before going out knocking on doors for candy -- it's warm and filling but also has the whole black and orange Halloween theme going on. Of course, it's good the other 364 days of the year, too.

On a semi-related note, this is my 100th post. Happy Halloween indeed!


Halloween (Black Bean & Pumpkin) Chili
From One Dish Vegetarian Meals
  • 1 tablespoon extra virgin olive oil
  • 1 large onion, chopped
  • 1 garlic clove, minced
  • 1 jalapeno, minced
  • 2 pounds pumpkin or butternut squash, peeled, seeded, cut into 1/2-inch chunks
  • One 28-oz can or two 14-oz cans diced tomatoes
  • 1 cup water
  • 1 cup apple juice
  • 4 tablespoons chili powder
  • 1 teaspoon salt
  • 1/8 teaspoon cayenne pepper
  • 3 cups cooked or canned black beans, rinsed and drained if canned
Heat the oil in a large pot over medium heat. Add the onion, garlic, and jalapeno. Cover, and cook, stirring occasionally, until softened, about 10 minutes. Add the pumpkin/squash, diced tomatoes, crushed tomatoes, water, apple juice, chili powder, salt, and cayenne, and stir well. Bring to a boil, lower the heat, cover, and simmer until the pumpkin is tender, about 30 minutes.

Add the beans, and more water if the chili is too thick for your taste. Cover and continue to simmer for about 10-15 minutes to blend flavors.

Spanish Tomato Soup with Roasted Chickpeas

Between the roasted red pepper, smoked paprika, almonds, and parsley, this recipe puts a major Spanish spin on classic tomato soup. After eating it I basically felt like taking a quick spin around the Prado and then catching a bullfight (and you probably know how I feel about bullfights). And this soup is not only very Spanish but also gooood. Like, lick-your-bowl-clean good. And so pretty (see below)! If I don't make this regularly throughout the upcoming cold weather months, I will be surprised.


Spanish Tomato Soup with Roasted Chickpeas
Adapted from Cooking Light
  • Red bell pepper, halved lengthwise
  • 2 tablespoons olive oil, divided
  • 8 garlic cloves, roughly chopped, divided
  • 1/4 cup heavy whipping cream
  • 28-oz can no-salt-added whole peeled tomatoes
  • 1/2 teaspoon smoked paprika (more to taste)
  • Salt and pepper
  • 15-oz can chickpeas, rinsed and drained
  • 1/4 teaspoon ground cumin
  • 1/4 cup fresh flat-leaf parsley
  • 2 tablespoons sliced almonds, toasted
Preheat broiler. Discard seeds and membranes from bell pepper; place, skin sides up, on a foil-lined baking sheet. Broil 8 minutes or until blackened. Seal in a bag and let stand 10 minutes. Peel. Reduce oven to 450 F.

Heat 1 tablespoon oil in a saucepan over medium heat. Add 3 garlic cloves; cook 1 minute. Add canned tomatoes (crush them with your hands before adding) and cream; bring to a simmer. Add paprika, a big pinch of salt, and a few grinds of the peppermill. Simmer 20 minutes, stirring occasionally. Blend with an immersion blender, or blend in batches in a regular blender. (If using a regular blender, it's safer to let the soup cool for 5-10 minutes first.)

Meanwhile, while soup is simmering, combine 5 garlic cloves and chickpeas in a roasting pan. Drizzle with remaining tablespoon oil, cumin, and a pinch of salt. Toss to combine. Roast at 450 F for 12 minutes, stirring once. Ladle soup into bowls and top evenly with chickpea mixture, parsley, and almonds.

Triple Green Curry

This southeast Asian curry has got a triple dose of green. First, you start with a blended green curry paste made with shallots, spices, and chilies. Second, you cook some nutritious green veggies (broccoli and bok choy) in a delicious coconut broth spiked with the curry paste. Third, you sprinkle fresh green herbs (basil and mint) over the whole thing at the end.


Triple Green Curry
From Cooking Light
  • 1/2 cup chopped fresh cilantro
  • 2 tablespoons chopped peeled fresh ginger
  • 2 teaspoons ground coriander
  • 2 teaspoons ground cumin
  • 8 garlic cloves, peeled
  • 1-3 small serrano chiles, seeded (depending on how heat-tolerant you are)
  • 2 large shallots, coarsely chopped
  • 4 cups coarsely chopped broccoli florets (about 1 head)
  • 2 cups sliced baby bok choy
  • 2 teaspoons dark sesame oil
  • 4 teaspoons sugar
  • 1 tablespoon soy sauce
  • 3/4 teaspoon kosher salt
  • 14-oz can light coconut milk
  • 14-oz package water-packed organic firm tofu, drained and cut into 3/4-inch cubes
  • 1/4 cup fresh lime juice
  • 2 cups hot cooked long-grain white rice
  • 1/4 cup chopped fresh basil
  • 2 tablespoons chopped fresh mint
Combine first 7 ingredients (through shallots) in a food processor and process until smooth. Set aside.

Cook broccoli florets in boiling water in a large Dutch oven 3 minutes or until crisp-tender. Remove broccoli from water with a slotted spoon; drain and rinse with cold water. Drain and set aside. Return water to a boil. Add baby bok choy to pan; cook 1 minute. Drain and rinse with cold water. Drain and set aside.

Heat Dutch oven over medium-high heat. Add oil to pan and swirl to coat. Add cilantro mixture to pan; saute 1 minute, stirring constantly. Add sugar and next 4 ingredients (through coconut milk) to pan. Bring to a boil. Add tofu; cover, reduce heat, and simmer 6 minutes or until slightly thick. Add broccoli, bok choy, and juice. Cook 1 minute or until heated, tossing to combine.

Place 1/2 cup rice in each of 4 bowls. Spoon 1 1/2 cups tofu mixture over each serving. Sprinkle basil and herbs over each serving.

Rachael Ray Show - Food - Bolognese With Pappardelle

Pappardelle Bolognese Recipe1
Pappardelle Bolognese Recipe2
Pappardelle Bolognese Recipe3

Pappardelle Bolognese Recipe

Pappardelle Bolognese Recipe39
Pappardelle Bolognese Recipe40
Pappardelle Bolognese Recipe41
Pappardelle Bolognese Recipe42
Pappardelle Bolognese Recipe43
Pappardelle Bolognese Recipe44
Pappardelle Bolognese Recipe45
Pappardelle Bolognese Recipe46
Pappardelle Bolognese Recipe47
Pappardelle Bolognese Recipe48
Pappardelle Bolognese Recipe49
Pappardelle Bolognese Recipe50
Pappardelle Bolognese Recipe51
Pappardelle Bolognese Recipe52
Pappardelle Bolognese Recipe53
Pappardelle Bolognese Recipe 54
Pappardelle Bolognese Recipe 55
Pappardelle Bolognese Recipe 56
Pappardelle Bolognese Recipe 57
Pappardelle Bolognese Recipe 58
Pappardelle Bolognese Recipe 59
Pappardelle Bolognese Recipe 60
Pappardelle Bolognese Recipe 61
Pappardelle Bolognese Recipe 62
Pappardelle Bolognese Recipe 63
Pappardelle Bolognese Recipe 64
Pappardelle Bolognese Recipe 65
Pappardelle Bolognese Recipe 66
Pappardelle Bolognese Recipe 67
Pappardelle Bolognese Recipe 68
Pappardelle Bolognese Recipe 69
Pappardelle Bolognese Recipe 70
Pappardelle Bolognese Recipe 71
Pappardelle Bolognese Recipe 72
Pappardelle Bolognese Recipe 73
Pappardelle Bolognese Recipe 74
Pappardelle Bolognese Recipe 75
Pappardelle Bolognese Recipe 76
Pappardelle Bolognese Recipe 77
Pappardelle Bolognese Recipe 78
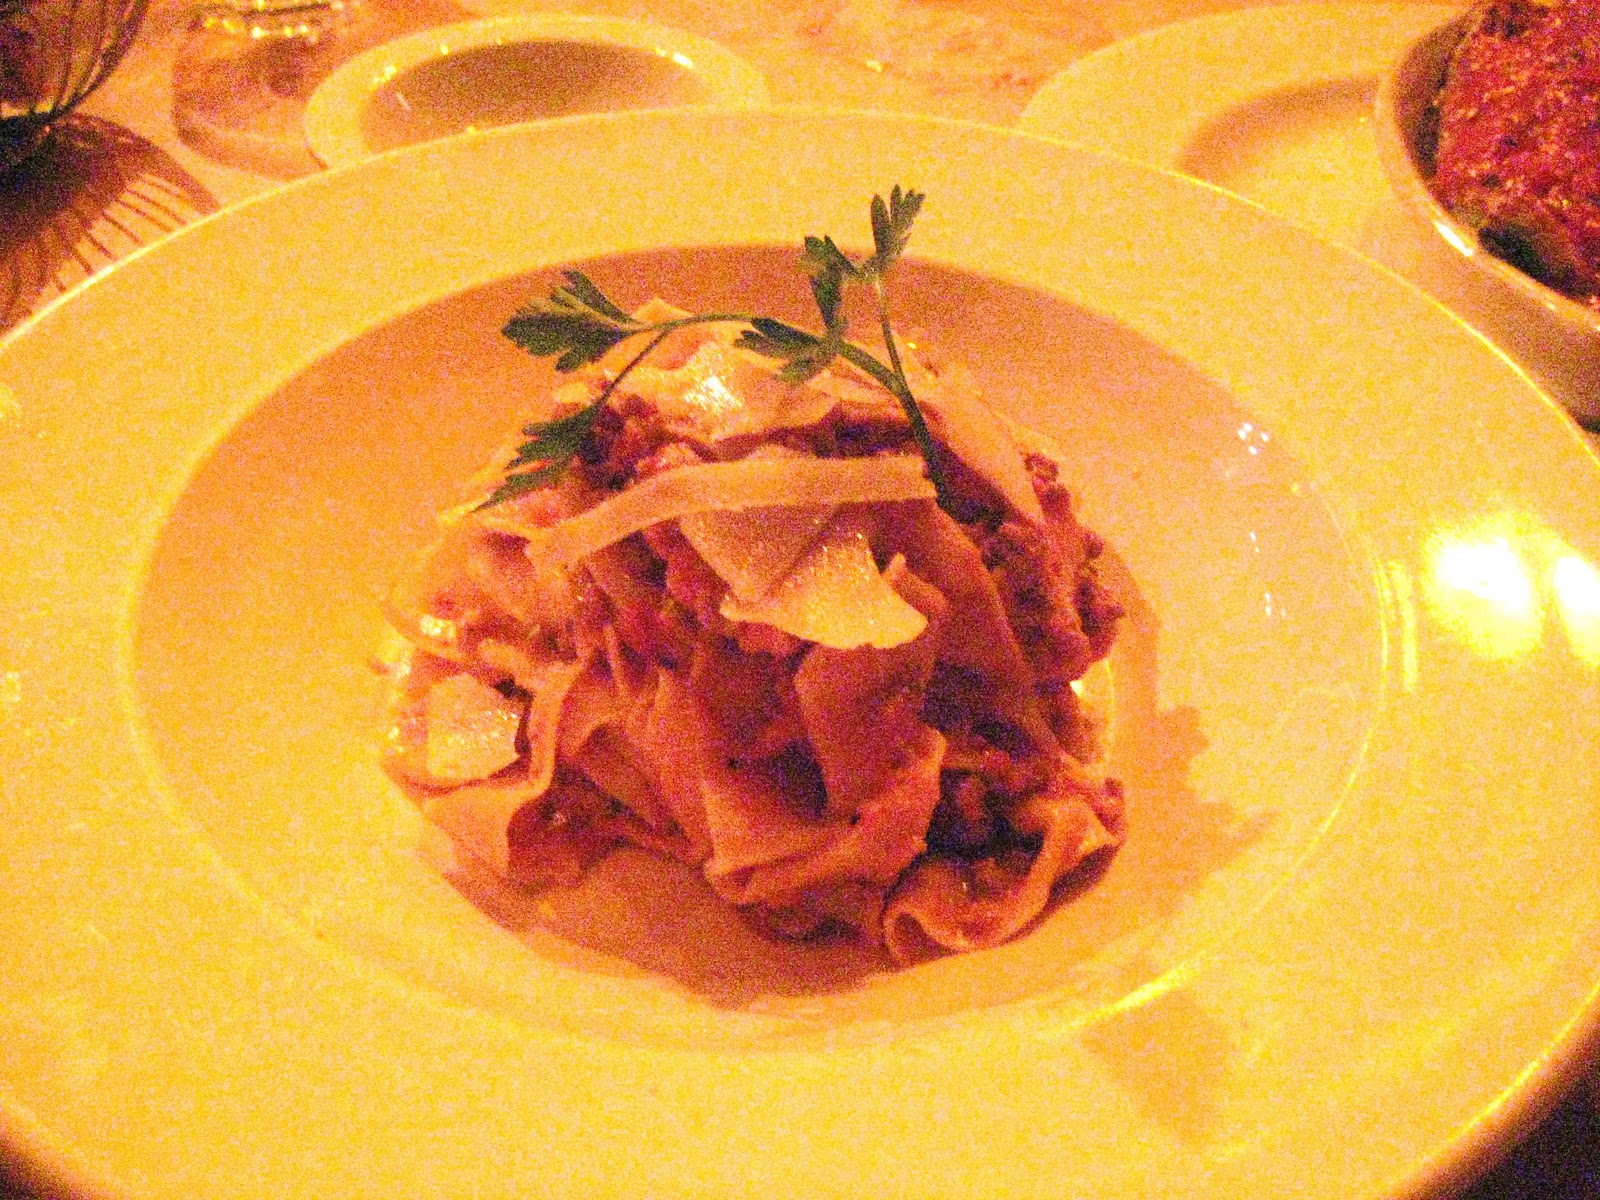
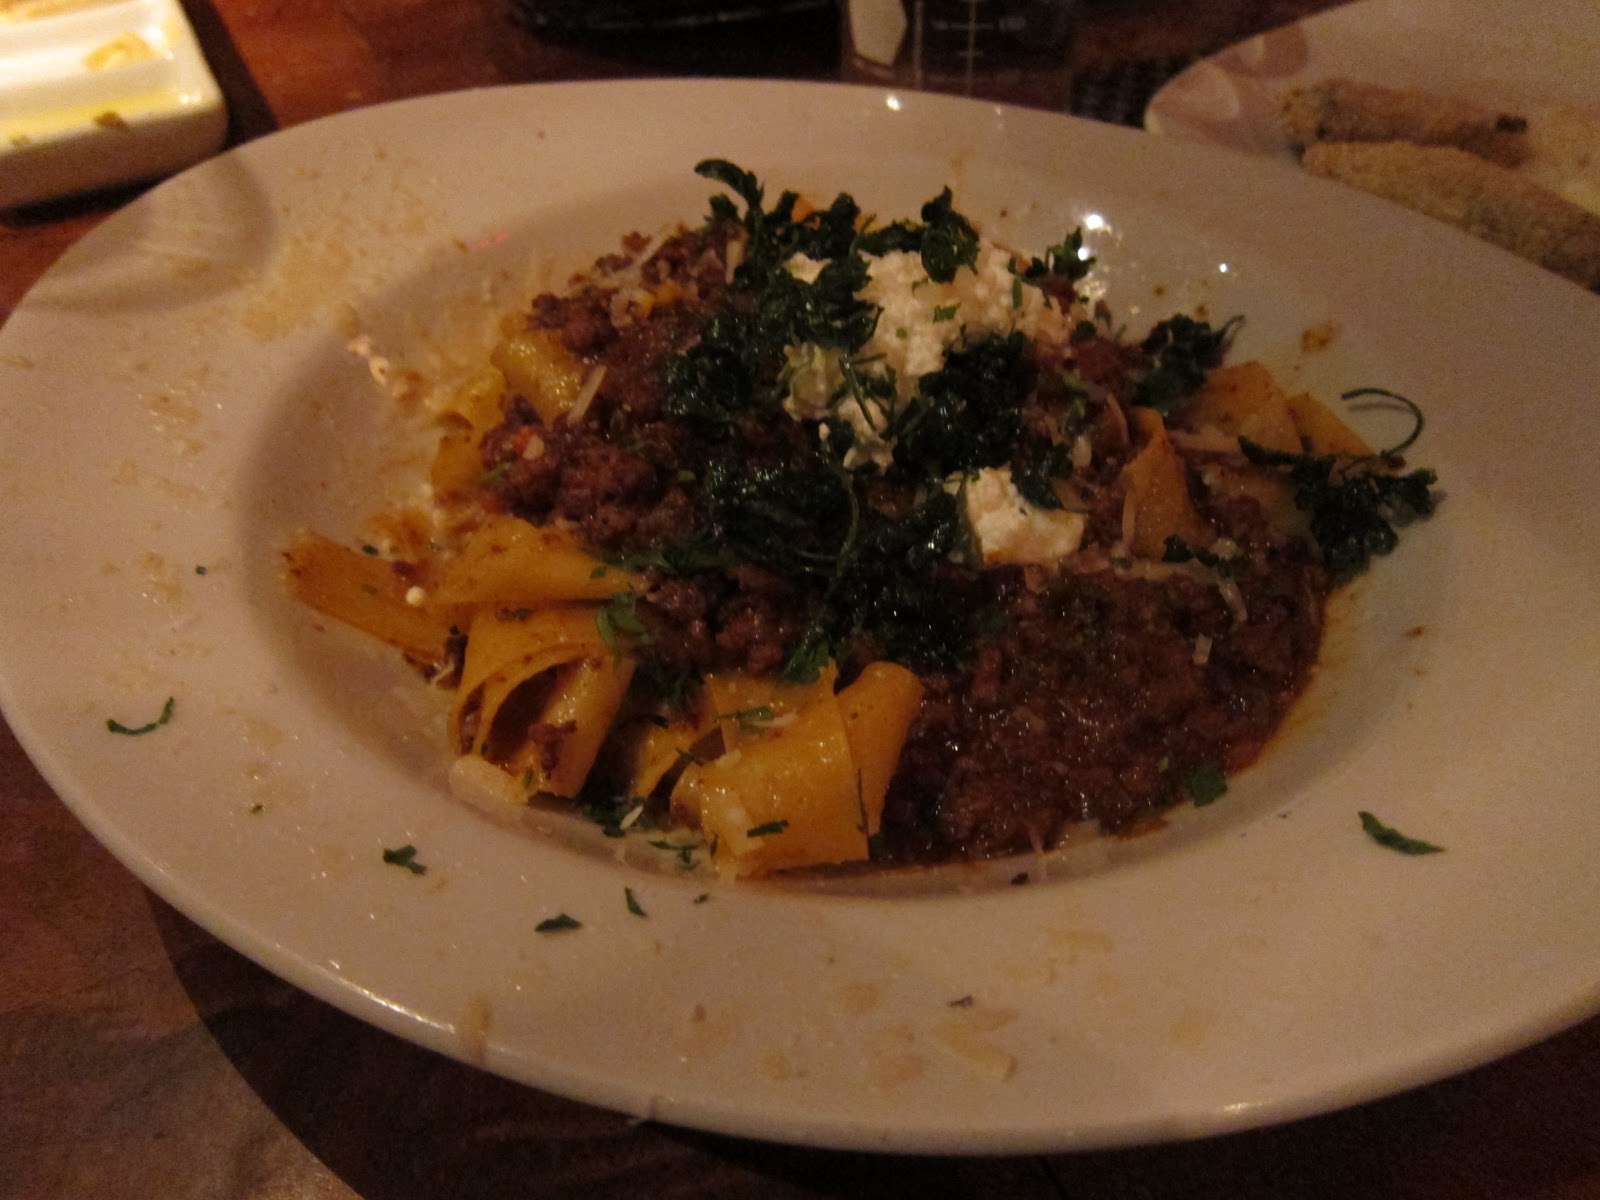
And my recipe below is another variation. Is mainly based on the recipe that appears in Molto Italiano, but I changed some things. Some call for white wine, some red. Use a little meat, veal others. Some have milk, others do not. The variations are endless. We agreed it was perfect - especially meat, tomatoes and perfect just enough with a little grated Parmigiano-Reggiano on top.
This makes a lot of good size - which froze some for future use. Or make for a crowd - this would serve 6 to 8 people with a salad and bread. We like pappardelle, but any pasta will work. If it had been a little more adventurous, I have done at home. My version calls for red wine. I used a Zenato Valpolicella and then we had the same wine with the meal. Matched beautifully.
Pappardelle Bolognese Tyler. Ok, I realize that this is the second time I have made bolognese within a month.